MCU program implementation [Program transfer using ST-LINK]
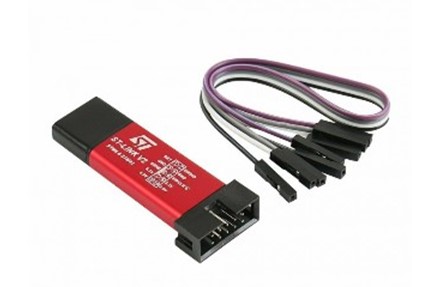
Table of contents
Program transfer tool

When you create a new program and build it, you will usually encounter syntax errors, compiler errors, and link errors. These errors are usually caused by the programming language and its development environment.
This is a simple process, but only after all errors are resolved is the build successful and a binary file is created to be written to the microcontroller. Once the binary file is generated, a dedicated tool is used to transfer the file from the development environment of the PC to the microcontroller for writing.
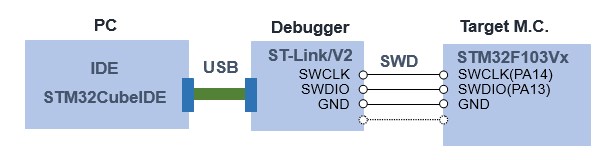
The transfer/writing tool is ST-LINK, which uses the ARM MCU standard SWD communication. As explained in "Recommended development environment ", ST-LINK/V2 version 2 or higher is used as the transfer tool in the STM32CubeIDE development environment.
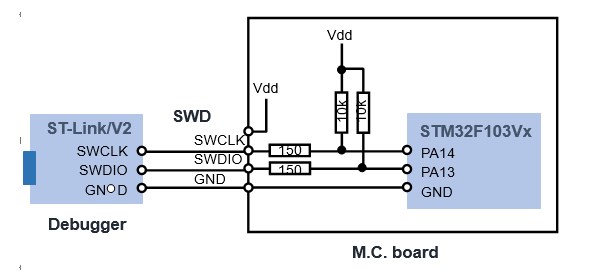
SWD can communicate by connecting two signal lines and GND. It can also function by directly connecting the pins PA13/PA14 for SWD on the microcontroller to ST-LINK debugging. This is fine for hobby use, but for products, insert a protection resistor or stabilize the signal with a pull-up resistor.
Program Transfer Method
Connect the microcontroller and the ST-LINK/V2 transfer/writing tool, and connect the USB cable to the PC to complete the preparations.
There are two ways to transfer and write.
① Transfer from STM32CubeIDE menu
The first is the way to transfer the program from the development environment STM32CubeIDE menu, and clicking "Run"-"Run" will start the program transfer. The LED on the ST-LINK device blinks during the transfer. This method is convenient because it allows you to execute the program up to writing in the same environment as the build.
② Transfer from the application ST-LINK Utility
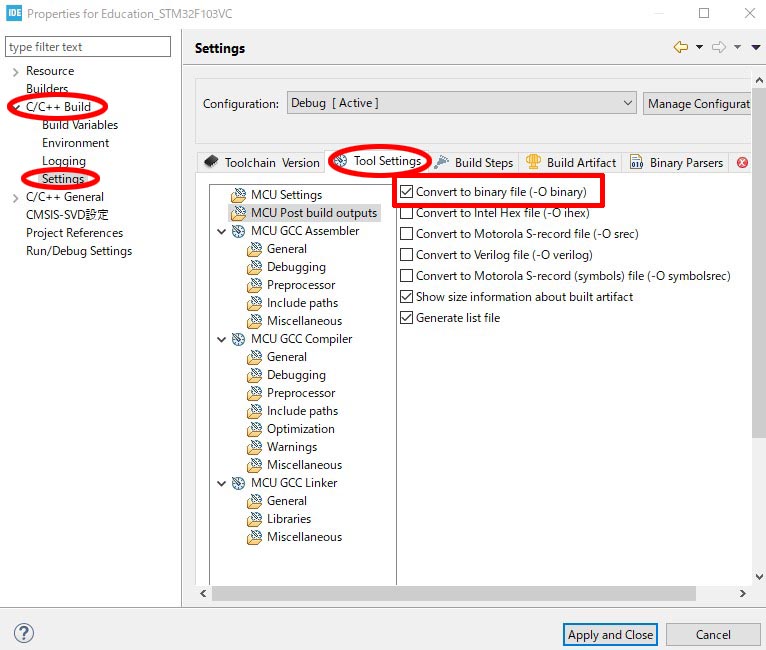
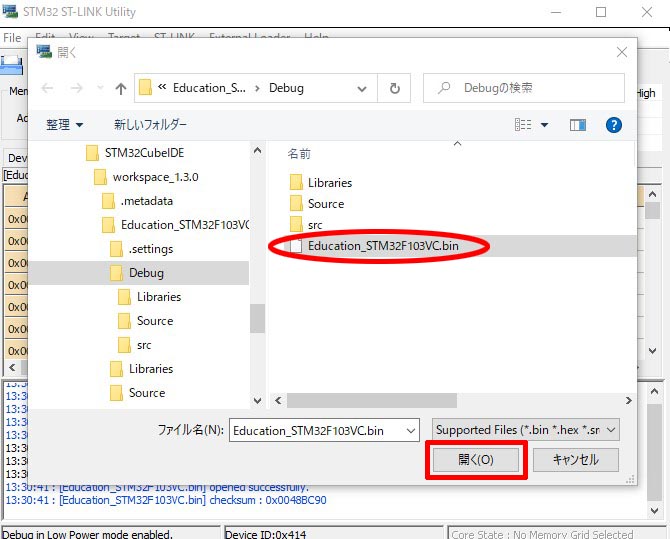
The second method is the way to use ST-LINK Utility, an application provided by STMicroelectronics to perform transfer writing. In this case, it is necessary to specify a binary file with the extension bin or a hex file, so it must be set to be generated by STM32CubeIDE in advance.
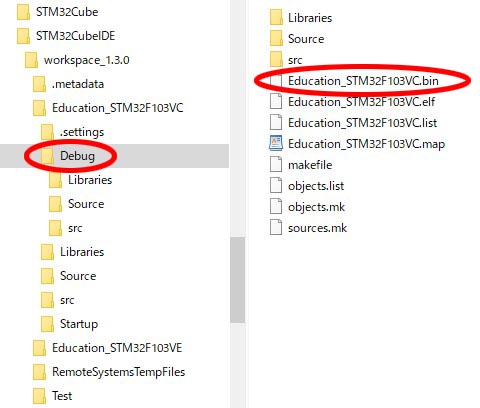
The generated file is located in the "Debug" folder under the project folder, so specify the target file. Using the ST-LINK Utility, you can not only transfer and write programs, but also specify program protections.
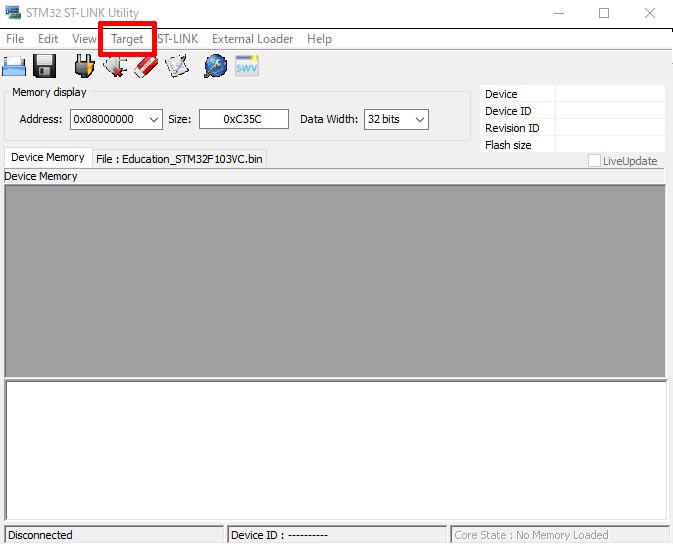
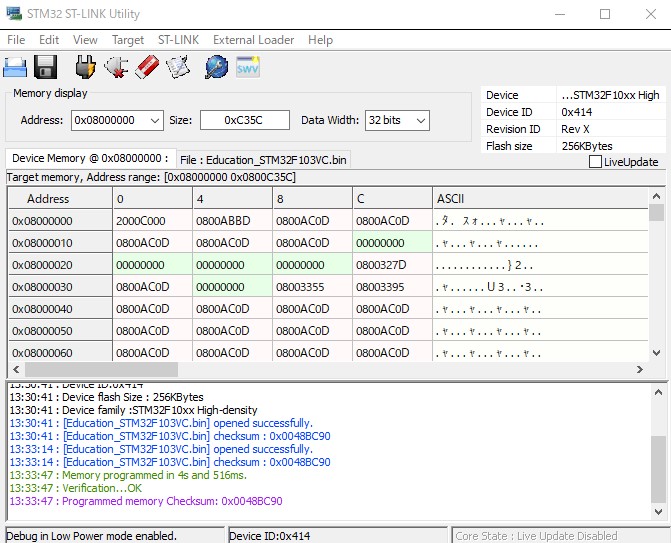
Start ST-LINK Utirity and click "Target" - "Program & Verify" in the menu.
After specifying the location of the binary file to be transferred (1), press "Start" (2) to start program transfer.
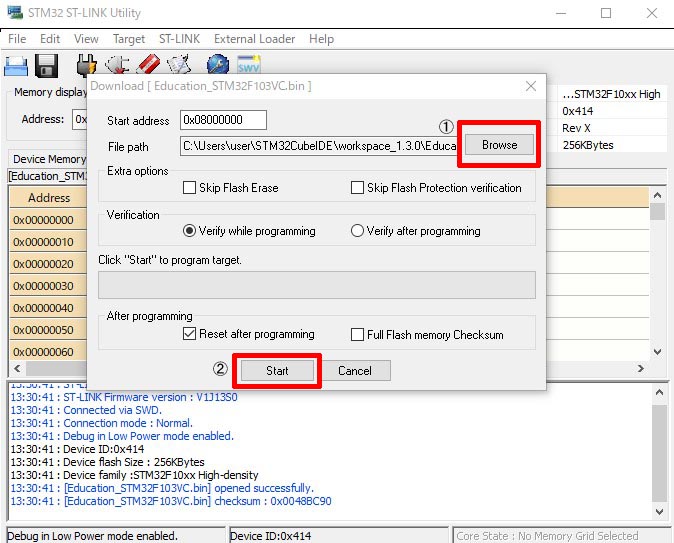
When the transfer is complete, the program can be seen being written from address 0x08000000.
Supplemental:
When transferring using the ST-LINK device for the first time with the STM32CubeIDE, an error may appear as shown in the figure below.
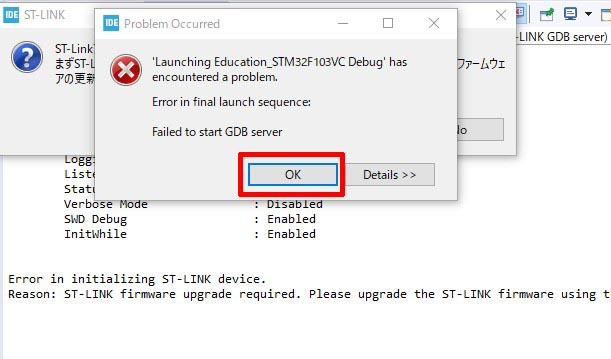
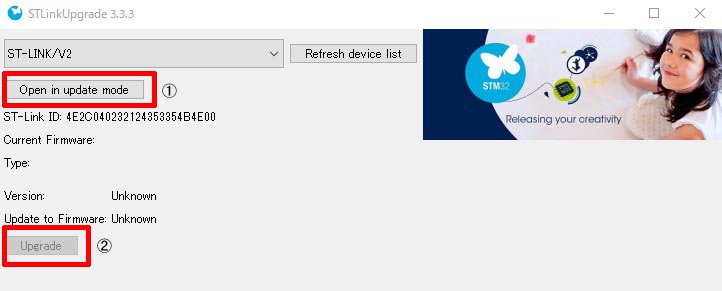
This is because the ST-LINK device firmware is out of date for the STM32CubeIDE and needs to be updated.

Please follow the instructions to update the software.
Please use either (1) STM32CubeIDE or (2) ST-LINK Utility to perform write transfer in a convenient way.